Blogging 201, Day Ten: HTML Columns, Tables, and Post Styling

Blogging 201, Day Ten: HTML Columns, Tables, and Post Styling

Once you have some basic familiarity with HTML, you can use the HTML Editor to add code that overrides the Visual Editor’s defaults — handy for poets, creative writers, and anyone who has a very specific idea of how they want their posts to look.

Today’s takeaway: we’ll understand how to use HTML to manipulate a post’s formatting — making columns, adding (or removing) spacing, creating unusual indentation, and more.

The Visual Editor does a pretty good job of formatting content in a neat, reader-friendly way. But what if you have a particular vision for your post, and it doesn’t give you enough flexibility? HTML to the rescue.

blog 1

” I don’t want to go viral, I want to set hearts on fire. ― Coco J. Ginger”

Blogging 201, Day Ten: HTML Columns, Tables, and Post Styling

Head to the Commons to learn:

* How to use preformatting to space text exactly as you’d like
* How to control line breaks and indentation
* How to create columns
* How to add tables

Action time! Open a draft post, and create either a column or table from scratch using HTML. (You can trash the post when you’re done.)

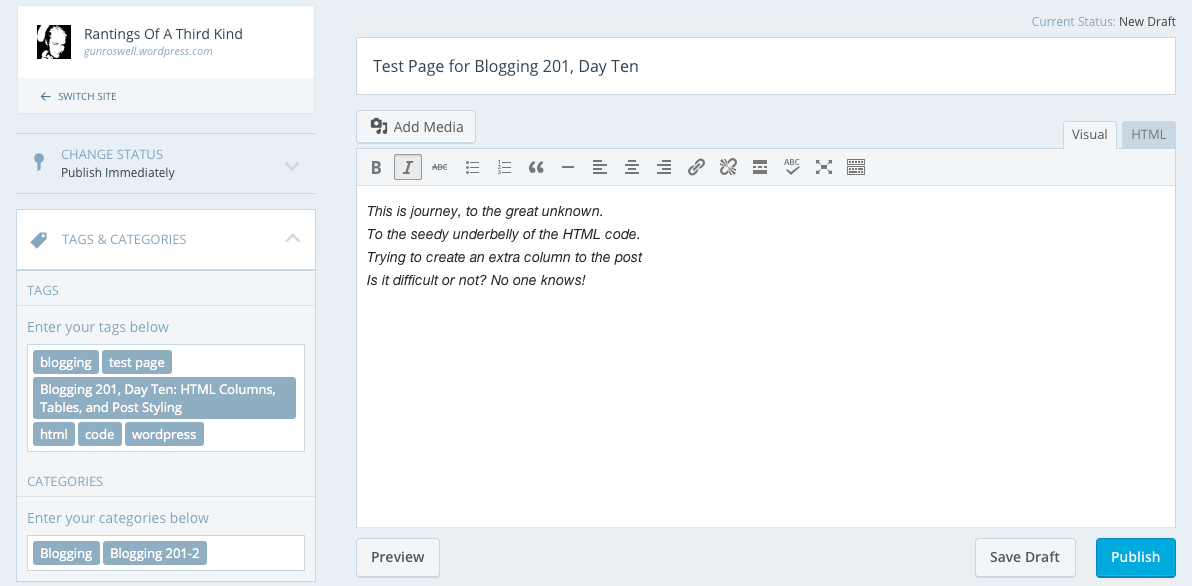
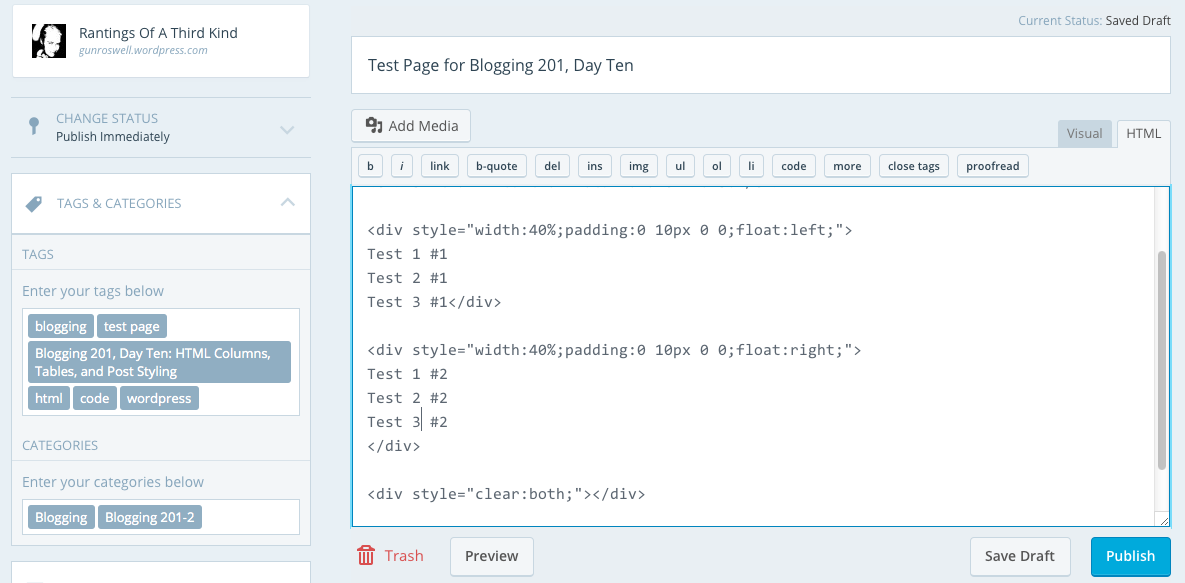
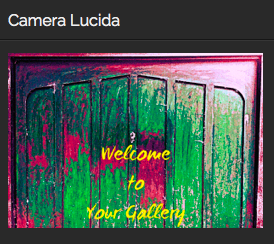
My effort for the day:
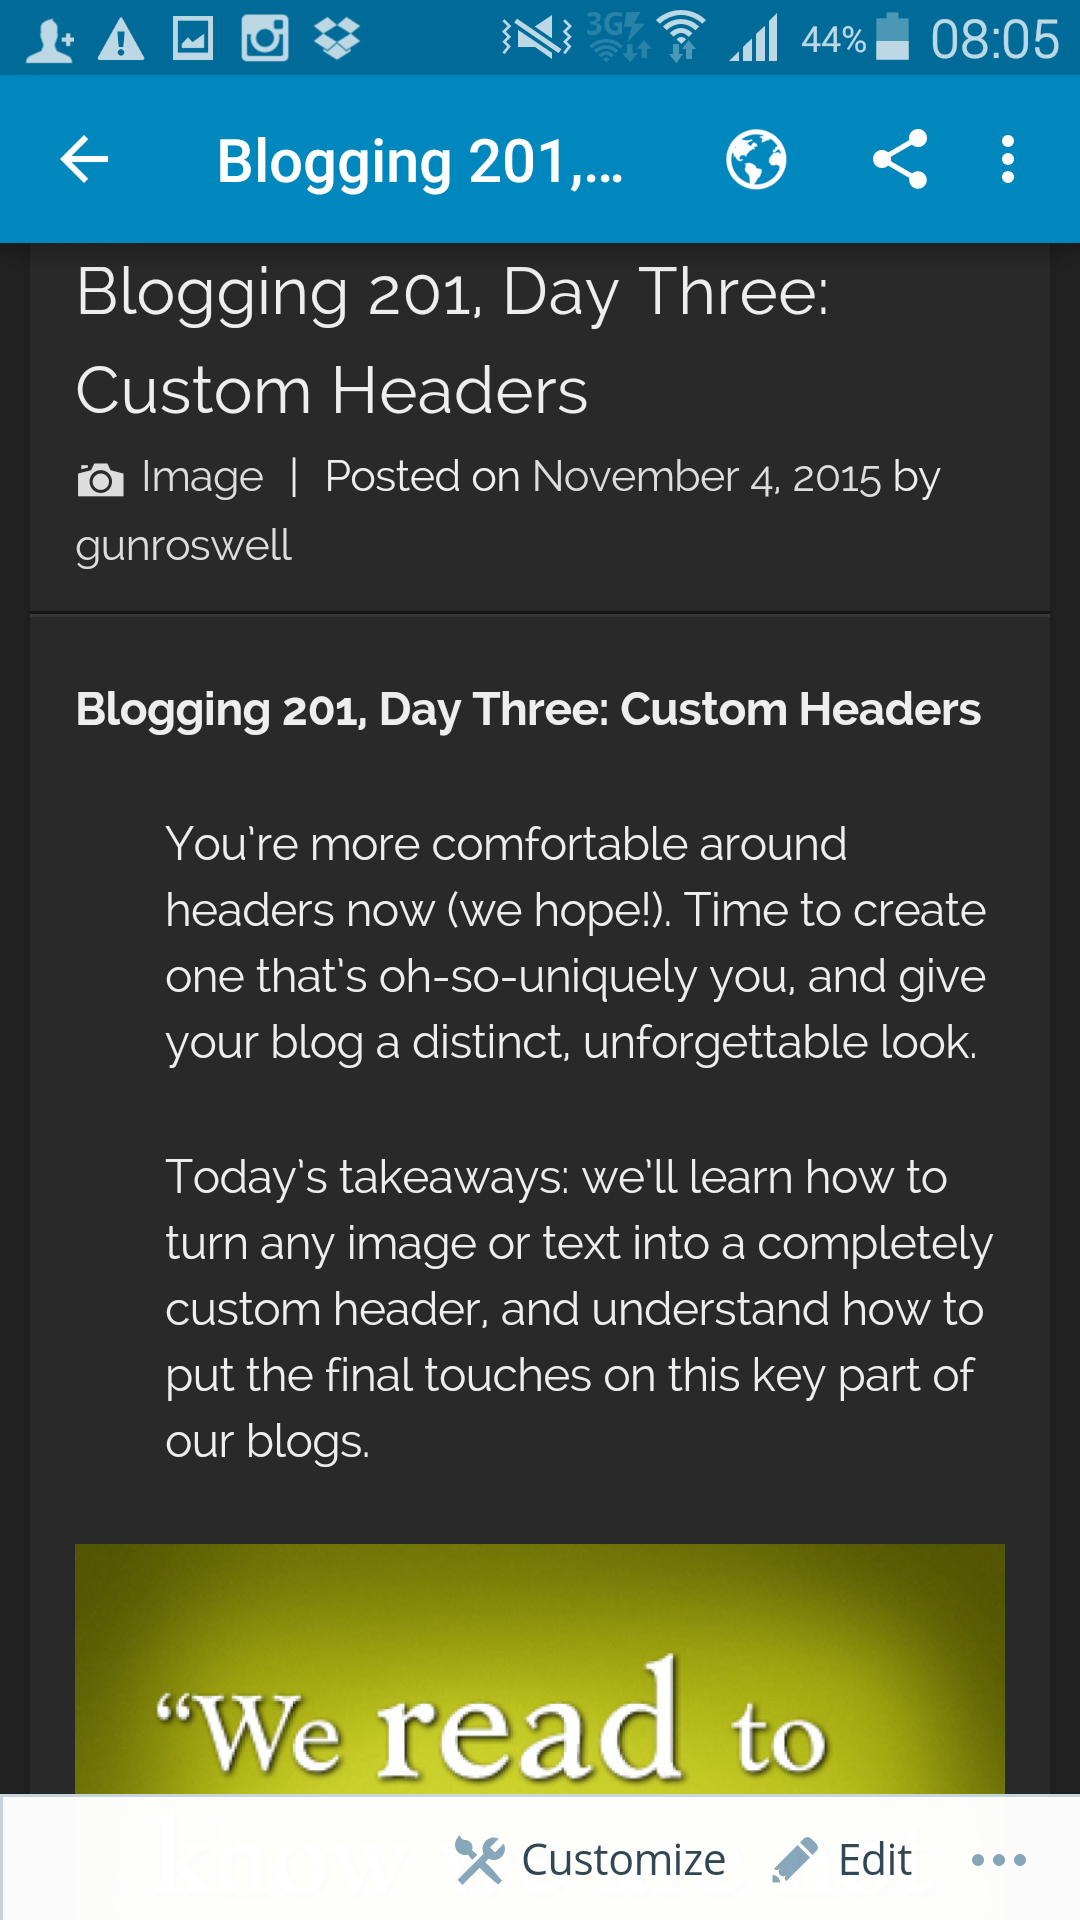
Day Ten, Part Two

Keep calm and keep on blogging!

code 2

Blogging 201, Day Ten: HTML Columns, Tables, and Post Styling, Part Two

Blogging 201, Day Ten: HTML Columns, Tables, and Post Styling, Part Two, Test Page

blog 2

” I don’t want to go viral, I want to set hearts on fire. ― Coco J. Ginger”

Blogging 201, Day Ten: HTML Columns, Tables, and Post Styling

Test Page for Blogging 201, Day Ten

This is journey, to the great unknown.
To the seedy underbelly of the HTML code.
Trying to create an extra column to the post
Is it difficult or not? No one knows!


Today’s testing results:

visual

html

post


Keep calm and keep on blogging!

code

Blogging 201, Day Nine: HTML Basics

Blogging 201, Day Nine: HTML Basics

A few days ago, we talked about text widgets and gave you a bit of code that would let you display an image in a text widget. That code was HTML, and there’s lots more it helps you do.

Today’s takeaways: we’ll understand what HTML is, how to find our posts’ and pages’ HTML, and a few foundational HTML tags.

The content of all your posts and pages is written in HTML, even if you don’t know it. When you’re drafting, you have access to a Visual Editor and an HTML Editor. The Visual Editor approximates what your post will actually look like, and automatically creates the HTML. The HTML Editor lets you see and edit the underlying code; viewing your post in the HTML Editor gives you some more editing options, and can help clarify why your posts look the way they do.

html1


“Not only are bloggers suckers for the remarkable, so are the people who read blogs” Seth Godin

Blogging 201, Day Nine: HTML Basics

Head to the Commons to learn:

* What HTML is, and how to find yours
* Basic text styling with HTML
* Inserting links with HTML
* Inserting images with HTML

Action time! In your next post, create a link using HTML.

binaryfox__computer_background_by_wickedoreo-d5hlldg

First off, I have to admit I am actually quite familiar with HTML (and XML). I was already coding some twenty years ago with C, Java and C++. First in school, then in school again and surprisingly, the third time in school. I actually have a degree both in software and web design. But as life would have it, I ended up doing completely different things in the wide world of IT.

I have worked with MS SharePoint and Joomla, which in many ways are similar to the current offering of WordPress in the form of a blog site. I also used to build and host my own sites over ten years ago, when no such thing as blogging, twitter or similar existed. And believe you me, it took a lot of time and effort to complete one simple site.

Guess what I am trying to convey here is: Thank goodness for built in HTML editors, where I don’t have to worry about code anymore! Saves me a lot of time and effort to make a simple post out there for the world to see! But that being said…

In response to the action given, please visit my personal home page as guided by this link, done in HTML code:

Check out my personal home page!


Keep calm and keep on blogging!

stock-footage-d-background-of-green-binary-numbers

Blogging 201, Day Eight: Widget Visibility

Blogging 201, Day Eight: Widget Visibility

Widgets: can there possibly be anything left to learn? Yes! Time to dig in to widget visibility.

Today’s takeaway: learn to specify exactly which widgets appear on which posts or pages by using the visibility settings built in to each one.

Action time! Adjust the visibility settings of one of your widgets. You can always undo it, but get a sense of how the settings work.

simplified-blogging copy
“I no longer buy papers or tabloids or magazines or read blogs. I used to.” Adele

Blogging 201, Day Eight: Widget Visibility

Using widget visibility to your advantage

* Hide your Flickr Widget on posts tagged with “photography” if you don’t want Flickr image thumbnails displayed when visitors are viewing a photo-heavy post. (There is such a thing as image overload!) (Select Hide and add Tag is Photography.)

* If you have a group blog, show the Twitter Widget of the appropriate contributor on posts tagged with that author. (Select Show and add Author is [Contributor’s Name].)

* If you’re an author, hide the custom Image Widgets linking to your books on your “Books” page to avoid duplicate information. (Select Hide and add Page is Books.)

* Hide the widget displaying your blogroll on a “Favorites” page, which may also be full of links. (Select Hide and add Page is Favorites.)

I was playing around with the visibility settings a little bit today. I found it useful for the sidebar to be visible for the pages and posts. It’s very easy to navigate back and forth, when the options are handy on the right hand side, rather than using the back button or having to scroll endlessly.

The “hide” and “unhide” is an great option, if you have specific widgets and it was great to have learnt the how-to today:)

Keep calm and keep on blogging!

blogCartoon copy

Blogging 201, Day Seven: Custom Text and Image Widgets

Blogging 201, Day Seven: Custom Text and Image Widgets

We have a better sense of what widgets offer, so let’s go further. Completely custom widgets let you create a cohesive look from header to sidebar.

Today’s takeaways: you’ll learn how to create, upload, and configure custom widgets that extend the design elements you’ve been introducing elsewhere on your blogs.

Action time! Create a new custom image widget using the tutorial links above. if you don’t want to add any new widget content, add a graphic or photo element to an existing widget by using a custom image widget to add the graphic above the existing one.

rantings

“Blogging is … to writing what extreme sports are to athletics; more free-form, more accident-prone, less formal, more alive. It is in many ways, writing out loud” Andrew Sullivan, The Atlantic

Blogging 201, Day Seven: Custom Text and Image Widgets

Image widget basics

Using the image widget takes three steps:

– Upload an image to your blog’s Media Library.
– Add an image widget to your sidebar.
– Paste the URL of the image you uploaded into the widget.

I have added several image widgets into my blog’s sidebar. Some of them are related to the challenges I participate in on a weekly basis, and some are for the various blogging university workshops I am /have taken part in and a few to writing sites as well.

I used to have the badges for all the nominations and blogger awards too, but the clutter got too much and I had to downsize. I am even thinking of doing more clean up after this blogging course 😉

Please find attached some examples of the same:
1    2

3    4

5    6

Keep calm and keep on blogging!

Blogging 201, Day Six: The Uncluttered Sidebar

Blogging 201, Day Six: The Uncluttered Sidebar

Time to move on to another part of your blog where small changes have a big impact: your sidebar.

Today’s takeaways: we’ll understand the purposes widgets serve, think critically about which widgets are most helpful for us, and start to basic widget customization.

Action time! Add one new widget to your blog — think strategically! — and customize its title and settings. You don’t have to keep it, but get comfortable with the process.

blog-is-merely-a-tool

“I think the word ‘blog’ is an ugly word. I just don’t know why people can’t use the word ‘journal.’” Moby

Blogging 201, Day Six: The Uncluttered Sidebar

Head to the Commons today to:

* Learn what widgets are how they’re useful
* Choose the right widgets for your blog
* Understand basic ways to customize widgets

I have found the widgets to be the most helpful and useful way to organize and arrange search both within the blog and to the outside links. I have also created a few widgets for some of the sites which challenges I take part in.

On the right hand side, I have placed widgets for; Recent posts, Top posts, Blogs I follow, Social Media buttons, Categories, Archives, Calendar, Blog following, Flickr and Instagram Photos among others. I put them in an order, which I consider to be most important (ascending order). Of course, I do change the order from time to time, depending, if I need to add or remove something.

Here are some examples from my blog:

Recent Posts    Top Posts

Categories, By Month   SoMe

Monthly    Challenges, Sites part of


Keep calm and keep on blogging!

i-m-famous-but-no-one-knows-it-yet

Blogging 201, Day Five: Free Day!

Blogging 201, Day Five: Free Day!

We know there’s been a lot to digest, so today is a free day! Use it to spend more time on something you didn’t quite grasp the first time around, to experiment with more headers and backgrounds, or to offer feedback and support to others.

Pro tip: If you want a place to play with colors and images without worrying about affecting your blog, create a free, private test blog where you can experiment to your heart’s content away from the public eye. Here’s how.

images-1

“A blog is neither a diary nor a journal. Many people think of blogging in relation to those two things, confessional or practical. It is neither but includes elements of both.” Lemn Sissay

Blogging 201, Day Five, Free Day

* Test blog: (https://dailypost.wordpress.com/2013/10/30/test-blogs/)
* Test drive themes and explore their options to find which you like best.
* Try different layouts — one sidebar, or two? A static home page? Custom menus? — and see what suits your content.
* Practice your WordPress.com skills. Insert a tiled gallery of images, or embed a few tweets. Play with post formats. Create a custom form, and tweak the fields. Get comfortable with the tools at your disposal.
* Give CSS a try. Hide a post’s metadata or change the padding around images without worrying that you’ll accidentally delete your header or turn your font purple.

This is an excellent and useful tool! Rather than accidentally mess up your live blog, I was able to fool around with “what could be”.

Summa sumarum: I will run my simulation on new ideas, code and what have you in the testbed from now on as I endeavour to improve my blog. But on that same note, and not to repeat myself once too often, I will keep my blog as is, at least for time being.

Keep calm and keep on blogging!

keep calm and

Blogging 201, Day Four: Backgrounds and Fonts

Blogging 201, Day Four: Backgrounds and Fonts

You’re a theme pro, and you have a great plan for your header. Time for two more free tweaks that add a lot of texture to your blog — backgrounds and fonts.

Today’s takeaways: you’ll learn how to change your background color or add your own image, understand the effect different colors and patterns have on your blog, explore background shades that work with the other colors and patterns on your blog, and learn to pick the right font for you.

blog pic 1

“Every time you post something online, you have a choice.You can either make it something that adds to the happiness levels in the world—or you can make it something that takes away”

Blogging 201, Day Four: Backgrounds and Fonts

* Step-by-step instructions on adding or changing your background
* Background dos and don’ts
* A primer on color theory to help you identify hues that work together
* How to choose and change fonts

After running the blog with a few colours other than the black, oddly enough, I returned to black 😛 This colour seems most fitting for my photographs and combined with white font, the outcome is simple and perfect in my eyes. Dark gray is also great for photos as is a very dark blue.

blog pic 2

I also tried to increase the font, but it seems the current default setup is great, especially for mobile devices with smaller screens i.e. phones.

mobile 1

Main view of the blog

mobile 2

Post example

Blogging 201, Day Three: Custom Headers

Blogging 201, Day Three: Custom Headers

You’re more comfortable around headers now (we hope!). Time to create one that’s oh-so-uniquely you, and give your blog a distinct, unforgettable look.

Today’s takeaways: we’ll learn how to turn any image or text into a completely custom header, and understand how to put the final touches on this key part of our blogs.

cslewis

“Blogging is great, and I read blogs all day long. However, my goal is really to have a deep, meaningful discussion with people. For some reason, I’m able to accomplish this best via email” Jason Calacanis

Blogging 201, Day Three: Custom Headers

My header is customized using an image from my personal archives and stating the blog’s mission quite nicely:

Rantings Of A Third Kind
The Blog about everything and nothing and it’s all done in the best possible taste!

cropped-16576191154_4f1125227f_o