Blogging 201, Branding and Growth: Day Four: Give ‘Em What They Want

Blogging 201, Branding and Growth: Day Four: Give ‘Em What They Want

Time to take a step back. Live with the design you have for the day while we switch gears and start focusing on your content. We’re diving into stats to learn more about what your readers love.

Today’s assignment: do a basic stats analysis to help you create an editorial calendar for the next 30 days.

c88K3

“There are lies, damned lies and statistics” Mark Twain

Blogging 201, Branding and Growth: Day Four: Give ‘Em What They Want

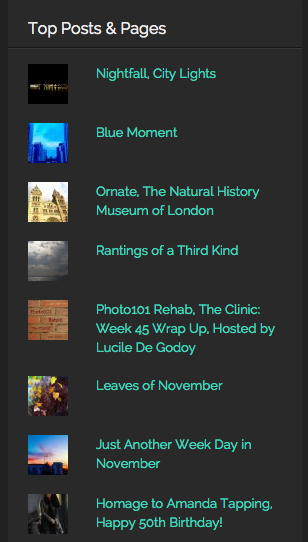
I have been following the statistics of my blog since day one, six months ago. Call it anal, call it interested, call it day job orientated motivation 😉 Keeping track on who, when, why is interesting. I quickly started utilizing the categories and tags for the posts. This helps on many levels; search, number or posts, statistics.

Due to working in full time employment in a completely different area means, that when I arrive back home, I start my second (albeit unpaid) job. This means all the brainstorming, writing and photographing happen between the hours of 5pm and usually 2 am, sometimes I am up until the sunrise next morning if I really have my inspiration on.

Since I am posting on daily basis now, with current setup of at least one poem and some photographs, there is no time to accumulate a backlog and vary the posting times. Luckily for me, this posting time (midnight for me) usually tends to be the busiest. Even my statistics sheet agrees!

My topics are as the blog tag line states: “Blog about everything and nothing and it’s all done in the best possible taste.” Meaning the content can be open to most every topic I can imagine. Possibly due to the simple fact, that humour plays a big role in most postings and adding photography to the mix, my followers seem to range from all ages and genders. Of course it is impossible to please everyone all the time, but I do have quite a few returning visitors and I try to do the same to my followings as well.

For statistics there is one qualm I have: those people who are not part of the WordPress community, cannot press the “LIKE” button. My followers by email only, exceed by two thirds the number of followers in the community. This also means I don’t get feedback from the email followers, unless they write me email or respond in the other social media forums.

monkey-blog

Blogging 201, Branding and Growth: Day Two: Audit Your Brand

Blogging 201, Branding and Growth: Day Two: Audit Your Brand

Some of us have purely personal sites to discuss the day-to-day, while others use our blogs as a springboard for other projects. No matter which describes you — or whether you’re a bit of both — you’re not just a blogger: you’re a brand.

You may never be Coca-Cola or Apple, but you can still use good branding to grow your blog.

Today’s assignment: audit your brand — look at all the ways you communicate information about your blog to make sure they’re consistent and focused — and make one update to reinforce it.

confrontational-audit-committee


“I always do a mental audit at the end of the week to make sure I’m balancing time between my career and my personal life” Jill Wagner

Audit Your Brand

ROATK

A blog about everything and nothing.
Fiction, fact, poetry, odes, homages, photography.
Humour, yet some serious thoughts.
And it’s all done in the best possible taste!


You can never go wrong with black background, white font and with a touch of gray, especially when photos are concerned. And since my blog is mostly about the photographs and the stories, then the outlook is excellent!

My current theme, The Visual Theme, serves well for both the written word and the images. The font and colours came with the theme and the simplicity pleases my eye at least for now. I have gotten a few compliments as well, so I know I am on the right track.

Rantings of a Third Kind, with the slug “Blog about everything and nothing and it’s all done in the best possible taste!” pretty much describes the nature of the blog, the writer and the contents. I do not really rant about things, but I like to keep that option open for the future;) I also have visions of adding more content like videos, short and longer stories, serials and photo stories to the site. A travel blog is in planning. Therefore I prefer not to tie the knot with any specific genre, format or subject.

My user name is my name, well, with a twist of course 😉

I also registered the domain for the site “rantingsofathirdkind.com” but am yet to implement the name change for the blog. I also have a domain for my user name “gunroswell.com” with an introductory page set up for the same.

I have used widgets to create more visibility for searches and links. Also keeping a calendar of the posts on the main page. In addition, advertising the community I follow.

I have accounts in Twitter, Facebook, Google+, LinkedIn, Tumblr, LiveJournal and Pinterest. This to advertise my postings to a wider audience outside the WordPress world. I have quite a few hits on Google alone and if you Google my name, site or use any of the tags for example from the fandom/homage posts, you can be certain my links will pop up on the top in a search!

For photographs, I also share them on Instagram, Flickr and the 500px community.


Tag line:
Rantings Of A Third Kind
Blog about everything and nothing and it’s all done in the best possible taste!

Contact and email:
A separate page for the contact form: https://atomic-temporary-83380856.wpcomstaging.com/contact/
Email address: gun@gunroswell.com


fit-for-purpose

Blogging 201, Branding and Growth, Day One: Set Three Goals, Part Two

Blogging 201, Branding and Growth, Day One: Set Three Goals


“Blogging isn’t about publishing as much as you can. It’s about publishing as smart as you can.” Jon Morrow

Blogging 201, Branding and Growth, Day One: Set Three Goals, Part Two

Day One: Set Three Goals

Why do you blog? For notoriety? To get a book contract? To self-publish? To establish yourself as a leader in your field? To gain followers? To connect with others? To clarify your own thoughts?

All of the above, but then again, none of the above. Confused? Good! That means I got your attention 😉

Why did I ever start a blog you ask? Well, there really is a very simple explanation to that. In the prehistoric blogging ages, you know those, when the dinosaurs roamed the earth… Ok, so maybe not that far back. Let’s go back some ten years, before the times of today’s so called social media and blogging. People actually wrote and published on the internet, but those days it was more personal and tight knitt groups who wrote and followed each others’ writings. I used to be one of those people.

In the here and now, everything is easy and you can post your thoughts, life and pretty much anything your heart desires and there are others who either a) read and enjoy what you have to offer or b) read and hate it. Simple as that.

Still not convinced?
Well, I like to write so, there. Simple truth, now written “out loud”.
Guess a book deal, a script deal or similar wouldn’t hurt either 😉

If your blog exceeded your wildest dreams, what would that look like? Would you have a different design? How many followers would you have? How much traffic? What sort of community would participate? How often would you post?

I would actually pay good money for someone with similar vision and time to revamp my site. With the limited time I have for this “night job” which I like to call my blogging, I barely have time to write and snap photos, never mind the outlook of the pages. The knowhow is there, the time is not. I rather spend the precious time I have for writing and leave the admin to someone else.

As my blog states, everything and nothing for anyone and no one, so the net is cast wide and as far as dreams go, well, I would like the world to enjoy my offerings, both written and visual. I would prefer to post eight hours a day, have it as a full time job. The good deyeties know I have enough material to last a few lifetimes. However, the reality is, after some full ten hours on the paying job, my night shift on the blog takes only second priority before sleeping and eating of course 😉 However, that being said, I am currently posting every day at least a poem, photo and a theme per day. I am also taking part in quite a few challenges and of course, Blogging U courses!

So to summarize (or to make a promise):
1) Never miss a day of blogging
2) Keep in touch with the community
3) Try on new things (for the blog) ;P

Keep Calm and Keep On Blogging Everyone!

104_main

Blogging 201, Branding and Growth, Day One: Set Three Goals, Part One

Blogging 201, Branding and Growth, Day One: Set Three Goals


“Don’t procrastinate. If you want to blog, then blog.” Fritz Chery

Blogging 201, Branding and Growth, Day One: Set Three Goals

Day One: Set Three Goals:

Welcome to Blogging 201: Branding and Growth! We’re excited about what we’re going to cover over the next two weeks, and we’re glad you’re joining us for the ride.

Today we want you to do a bit of thinking about your blog, so you can focus the next two weeks effectively.

Today’s assignment: consider what you want to accomplish with your blog. Write down three concrete goals.

Why are we doing this?

* Because writing down goals forces you to think carefully about what success means to you — “success” is different for everyone.
* Because having goals helps you focus. If something you’re doing isn’t helping you achieve your goals, ditch it.

Here are some questions to mull over to help you uncover/refine what’s most important to you about your blog:

Why do you blog? For notoriety? To get a book contract? To self-publish? To establish yourself as a leader in your field? To gain followers? To connect with others? To clarify your own thoughts?

If your blog exceeded your wildest dreams, what would that look like? Would you have a different design? How many followers would you have? How much traffic? What sort of community would participate? How often would you post?

Answering these questions helps you create a vision for your blog. Next, translate that vision into three specific goals. You can articulate your goals however you’re most comfortable, but we recommend making them simple, concrete, and time-based to create laser-like focus, like:

* Gain 20% more followers by January 15st.
* Increase average daily hits 30% by the middle of 2016.
* Publish three times each week during December and January.
* Spend one hour each week visiting my followers’ blogs, reading, and commenting from now until February 1st.
* Establish a new weekly feature on my blog by January 1st. (Throwback Thursdays, Wordless Wednesdays, Soup Sundays), and publish that feature each week through 2016.
* Create an editorial calendar for the next 90 days by December 31st.
* Gain 100 new Twitter followers by February 15th.
* Publish posts from three guests over the next three months.
* For bonus points, write a post detailing your blog’s goals and publish it. Making your goals public ups your accountability. Your readers will cheer you on, and might even find ways to help you achieve your goals.

Create a private page on your blog to keep track of your goals, or just write them on a post-it note — whatever works for you.

Stuck on what to pick for your goals? Not sure what’s actually reasonable? Head to The Commons to bounce ideas around with fellow challenge participants. You know the old saying: 1000 heads are better than one!

sell7

Blogging 201, Day Ten: HTML Columns, Tables, and Post Styling

Blogging 201, Day Ten: HTML Columns, Tables, and Post Styling

Once you have some basic familiarity with HTML, you can use the HTML Editor to add code that overrides the Visual Editor’s defaults — handy for poets, creative writers, and anyone who has a very specific idea of how they want their posts to look.

Today’s takeaway: we’ll understand how to use HTML to manipulate a post’s formatting — making columns, adding (or removing) spacing, creating unusual indentation, and more.

The Visual Editor does a pretty good job of formatting content in a neat, reader-friendly way. But what if you have a particular vision for your post, and it doesn’t give you enough flexibility? HTML to the rescue.

blog 1

” I don’t want to go viral, I want to set hearts on fire. ― Coco J. Ginger”

Blogging 201, Day Ten: HTML Columns, Tables, and Post Styling

Head to the Commons to learn:

* How to use preformatting to space text exactly as you’d like
* How to control line breaks and indentation
* How to create columns
* How to add tables

Action time! Open a draft post, and create either a column or table from scratch using HTML. (You can trash the post when you’re done.)

My effort for the day:
Day Ten, Part Two

Keep calm and keep on blogging!

code 2

Blogging 201, Day Ten: HTML Columns, Tables, and Post Styling, Part Two

Blogging 201, Day Ten: HTML Columns, Tables, and Post Styling, Part Two, Test Page

blog 2

” I don’t want to go viral, I want to set hearts on fire. ― Coco J. Ginger”

Blogging 201, Day Ten: HTML Columns, Tables, and Post Styling

Test Page for Blogging 201, Day Ten

This is journey, to the great unknown.
To the seedy underbelly of the HTML code.
Trying to create an extra column to the post
Is it difficult or not? No one knows!


Today’s testing results:

visual

html

post


Keep calm and keep on blogging!

code

Blogging 201, Day Nine: HTML Basics

Blogging 201, Day Nine: HTML Basics

A few days ago, we talked about text widgets and gave you a bit of code that would let you display an image in a text widget. That code was HTML, and there’s lots more it helps you do.

Today’s takeaways: we’ll understand what HTML is, how to find our posts’ and pages’ HTML, and a few foundational HTML tags.

The content of all your posts and pages is written in HTML, even if you don’t know it. When you’re drafting, you have access to a Visual Editor and an HTML Editor. The Visual Editor approximates what your post will actually look like, and automatically creates the HTML. The HTML Editor lets you see and edit the underlying code; viewing your post in the HTML Editor gives you some more editing options, and can help clarify why your posts look the way they do.

html1


“Not only are bloggers suckers for the remarkable, so are the people who read blogs” Seth Godin

Blogging 201, Day Nine: HTML Basics

Head to the Commons to learn:

* What HTML is, and how to find yours
* Basic text styling with HTML
* Inserting links with HTML
* Inserting images with HTML

Action time! In your next post, create a link using HTML.

binaryfox__computer_background_by_wickedoreo-d5hlldg

First off, I have to admit I am actually quite familiar with HTML (and XML). I was already coding some twenty years ago with C, Java and C++. First in school, then in school again and surprisingly, the third time in school. I actually have a degree both in software and web design. But as life would have it, I ended up doing completely different things in the wide world of IT.

I have worked with MS SharePoint and Joomla, which in many ways are similar to the current offering of WordPress in the form of a blog site. I also used to build and host my own sites over ten years ago, when no such thing as blogging, twitter or similar existed. And believe you me, it took a lot of time and effort to complete one simple site.

Guess what I am trying to convey here is: Thank goodness for built in HTML editors, where I don’t have to worry about code anymore! Saves me a lot of time and effort to make a simple post out there for the world to see! But that being said…

In response to the action given, please visit my personal home page as guided by this link, done in HTML code:

Check out my personal home page!


Keep calm and keep on blogging!

stock-footage-d-background-of-green-binary-numbers

Blogging 201, Day Eight: Widget Visibility

Blogging 201, Day Eight: Widget Visibility

Widgets: can there possibly be anything left to learn? Yes! Time to dig in to widget visibility.

Today’s takeaway: learn to specify exactly which widgets appear on which posts or pages by using the visibility settings built in to each one.

Action time! Adjust the visibility settings of one of your widgets. You can always undo it, but get a sense of how the settings work.

simplified-blogging copy
“I no longer buy papers or tabloids or magazines or read blogs. I used to.” Adele

Blogging 201, Day Eight: Widget Visibility

Using widget visibility to your advantage

* Hide your Flickr Widget on posts tagged with “photography” if you don’t want Flickr image thumbnails displayed when visitors are viewing a photo-heavy post. (There is such a thing as image overload!) (Select Hide and add Tag is Photography.)

* If you have a group blog, show the Twitter Widget of the appropriate contributor on posts tagged with that author. (Select Show and add Author is [Contributor’s Name].)

* If you’re an author, hide the custom Image Widgets linking to your books on your “Books” page to avoid duplicate information. (Select Hide and add Page is Books.)

* Hide the widget displaying your blogroll on a “Favorites” page, which may also be full of links. (Select Hide and add Page is Favorites.)

I was playing around with the visibility settings a little bit today. I found it useful for the sidebar to be visible for the pages and posts. It’s very easy to navigate back and forth, when the options are handy on the right hand side, rather than using the back button or having to scroll endlessly.

The “hide” and “unhide” is an great option, if you have specific widgets and it was great to have learnt the how-to today:)

Keep calm and keep on blogging!

blogCartoon copy

Blogging 201, Day Seven: Custom Text and Image Widgets

Blogging 201, Day Seven: Custom Text and Image Widgets

We have a better sense of what widgets offer, so let’s go further. Completely custom widgets let you create a cohesive look from header to sidebar.

Today’s takeaways: you’ll learn how to create, upload, and configure custom widgets that extend the design elements you’ve been introducing elsewhere on your blogs.

Action time! Create a new custom image widget using the tutorial links above. if you don’t want to add any new widget content, add a graphic or photo element to an existing widget by using a custom image widget to add the graphic above the existing one.

rantings

“Blogging is … to writing what extreme sports are to athletics; more free-form, more accident-prone, less formal, more alive. It is in many ways, writing out loud” Andrew Sullivan, The Atlantic

Blogging 201, Day Seven: Custom Text and Image Widgets

Image widget basics

Using the image widget takes three steps:

– Upload an image to your blog’s Media Library.
– Add an image widget to your sidebar.
– Paste the URL of the image you uploaded into the widget.

I have added several image widgets into my blog’s sidebar. Some of them are related to the challenges I participate in on a weekly basis, and some are for the various blogging university workshops I am /have taken part in and a few to writing sites as well.

I used to have the badges for all the nominations and blogger awards too, but the clutter got too much and I had to downsize. I am even thinking of doing more clean up after this blogging course 😉

Please find attached some examples of the same:
1    2

3    4

5    6

Keep calm and keep on blogging!

Blogging 201, Day Six: The Uncluttered Sidebar

Blogging 201, Day Six: The Uncluttered Sidebar

Time to move on to another part of your blog where small changes have a big impact: your sidebar.

Today’s takeaways: we’ll understand the purposes widgets serve, think critically about which widgets are most helpful for us, and start to basic widget customization.

Action time! Add one new widget to your blog — think strategically! — and customize its title and settings. You don’t have to keep it, but get comfortable with the process.

blog-is-merely-a-tool

“I think the word ‘blog’ is an ugly word. I just don’t know why people can’t use the word ‘journal.’” Moby

Blogging 201, Day Six: The Uncluttered Sidebar

Head to the Commons today to:

* Learn what widgets are how they’re useful
* Choose the right widgets for your blog
* Understand basic ways to customize widgets

I have found the widgets to be the most helpful and useful way to organize and arrange search both within the blog and to the outside links. I have also created a few widgets for some of the sites which challenges I take part in.

On the right hand side, I have placed widgets for; Recent posts, Top posts, Blogs I follow, Social Media buttons, Categories, Archives, Calendar, Blog following, Flickr and Instagram Photos among others. I put them in an order, which I consider to be most important (ascending order). Of course, I do change the order from time to time, depending, if I need to add or remove something.

Here are some examples from my blog:

Recent Posts    Top Posts

Categories, By Month   SoMe

Monthly    Challenges, Sites part of


Keep calm and keep on blogging!

i-m-famous-but-no-one-knows-it-yet